[SC 300/SC 400] przerobka dolotu sposób 2
: 20 wrz 2010, o 21:16
Here are a few more details of some of the parts I used to make the three chanbers of the BFI. All three parts of the BFI are necessary for maximum peformance. Even if you don't want to cut your airbox up, the intake chamber, under headlight chamber and Airbox seal will help a lot - especially for economy.
1. The BFI Intake Chamber - a large pressurised chamber of swirling fresh air - most debri is removed in this chamber. Car cooling is not affected. This is a straight forward procedure to make. Take the bottom engine try off so you can see the old plastic screws you have to remove. I reccommend this intake point for every Soarer, even the regular V8's.

The bolts that hold the intake flap firmly in place. I used 8mm bolts, 50 mm long with large washers to clamp onto the plastic intake edge. Notice the bolts are threaded full length - these were hard to get like this - I had to go to Universal Fastners to get them - couldn't get them that long at the hardware store - or couldn't get them threaded full length. 8mm metric refers to the tread size - this will screw right in to the hole in the bumper left by the plastic scrivet that used to secure the plastic flap to the bumper. This will hold the flap securely up to 178 km/hr - there is considerable force pushing the flap down when you are moving.
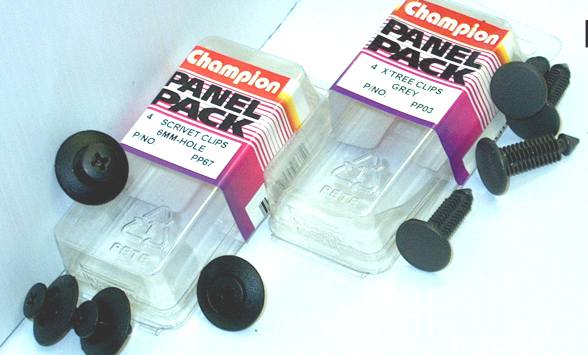
These are scrivets - they hold the plastic flap to the bumper - you can buy them for $2 a pack from auto parts stores - so don't worry about saving the old ones or damaging them - just get 'em out! I used new ones to hold my BFI top cover down for that original factory look - you can also get x-tree clips - they will all be on a stand together - check it out - heaps of handy bits and pieces there. I got mine at Andrew's MotorMate (08)8357 4211
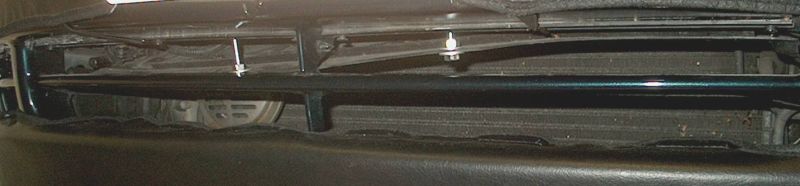
So here are the two bolts that hold the intake flap firmly in place. The bolt on the intake side is adjusted to hold the flap level with the opening in the bumper. The second bolt is adjusted to close off the flap - I have tried opening it up further but there doesn't seem be any performance improvement by opening up the intake any further - might as well let the air through to the radiator. The temperature gauge has never budged even on the hottest days - so the air we are taking from here and diverting to the intake still leaves enough for the cooling system.
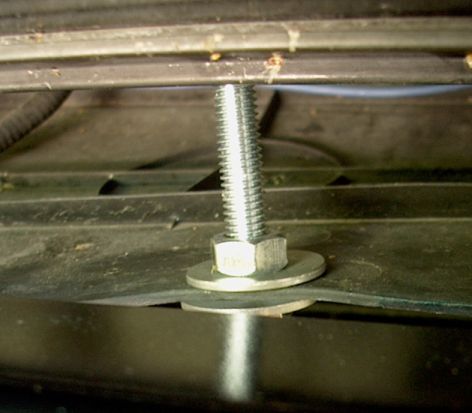
Close up of the first bolt holding the intake flap
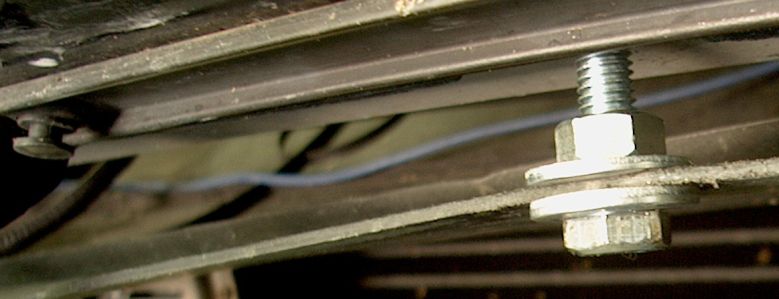
The second bolt - you can adjust this bolt to let more air in or exclude air - You might as well close it up - no performance bonus from opening it up.
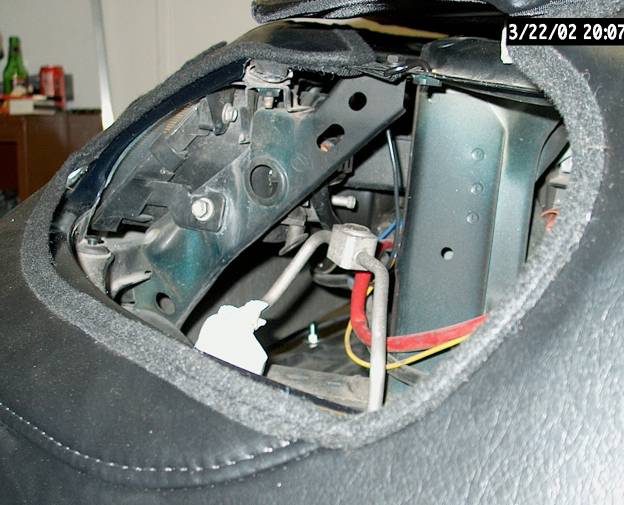
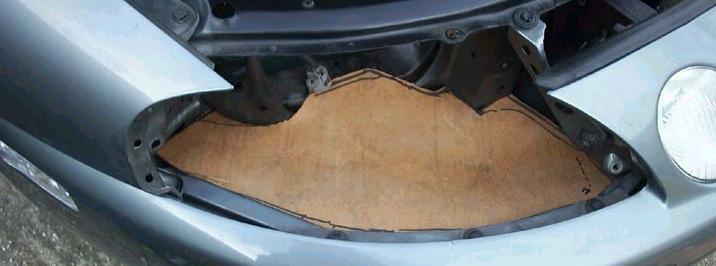
The intake must be sealed for maximum effect. This is the hole on the battery side of the car. This should be sealed. I have taken out the headlight to see it properly. We are talking about that triangular hole where the sight glass is for the air cond pokes through. In the middle of the hole in the background you can see the intake bolt shining. Worthwhile sealing. If you leave the headlight in place the best you can do is stuff an old T-shirt down there to seal it. Take the headlight out and you may be able to custom fit some plywood and rubber foam to seal it - use your imagination - you'll think of something!
This is where all the clean, cold, dry air comes out of the first chamber. The dirt, bugs and water get separated in the first chamber and drop out - it is self cleaning to a degree. All the air comes charging out of this triangular hole. No use putting any sort of pipe through here - it just reduces the area and reduces flow (I tried everything). You want to collect all this beautiful cold air and divert it into the intake. It can't go anywhere else. It won't go up the top because it is sealed against the bonnet - take a look - see the two rubber seals - one along the radiator support bar and the other along the nose - this area is already sealed up the top. It was just a big empty useless chamber just waiting to be BFI'ed. We are very fortunate that our car has such a chamber.
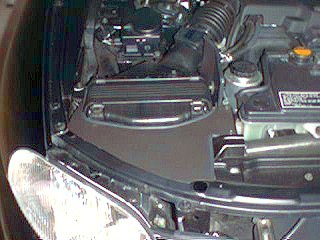
2. The BFI under headlight chamber - this bit seals off the intercooler (unless you have regular V8) and smoothly directs the air under the headlight into the airbox.

Check this out! An oragami Headlight BFI chamber! This is folded out of plastic corflute, light, strong and waterproof. We had an election here and all the politicians used this stuff to advertise themselves - we use it for BFI templates! I've had one in for about 3000 km so far and it is still going great. It just sits there with nothing else holding it in and works great.
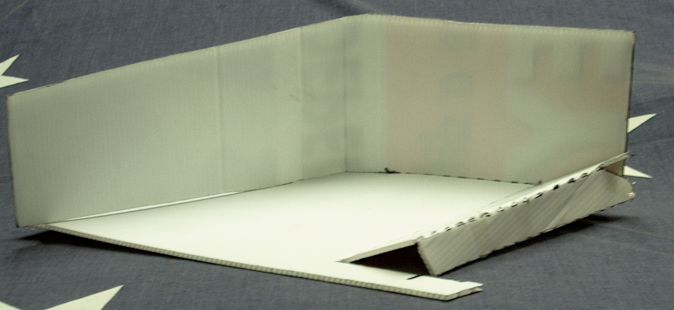
See how deep it is? Full depth for maximum area and flow. Ramps up to headlight hole with a small edge that tucks down and holds itself in place. The front edge rests on the bumper support - it doesn't move once it is in.
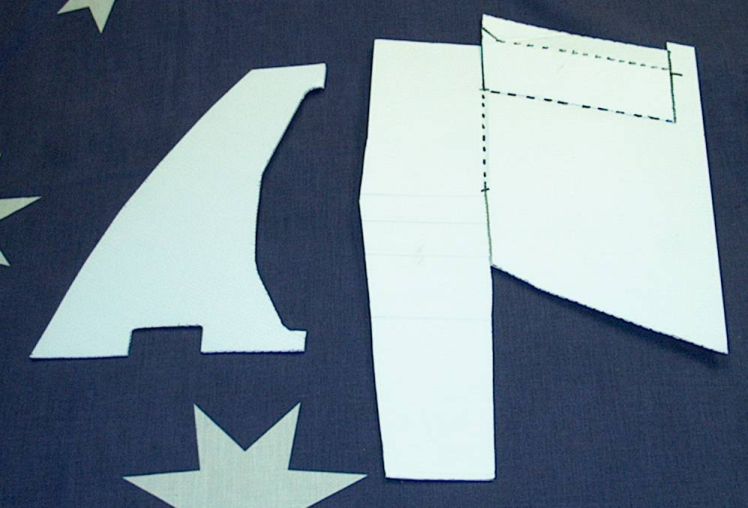
Here are the templates laid side by side - the one on the left is for the airbox top
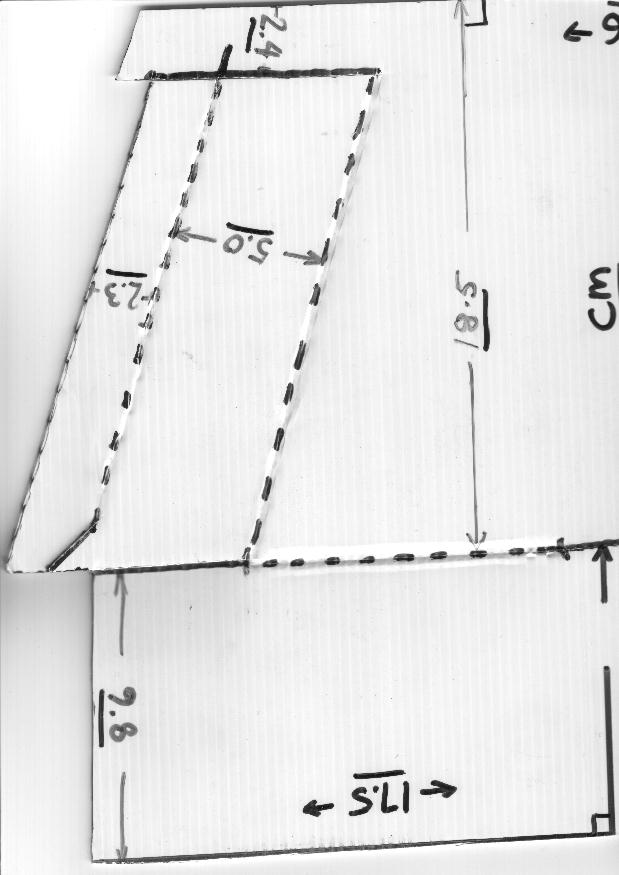
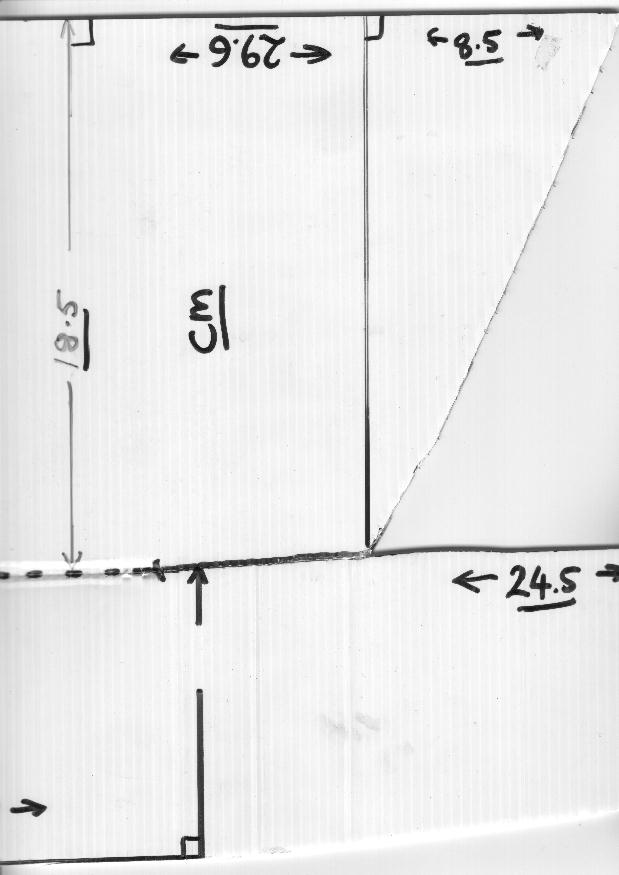
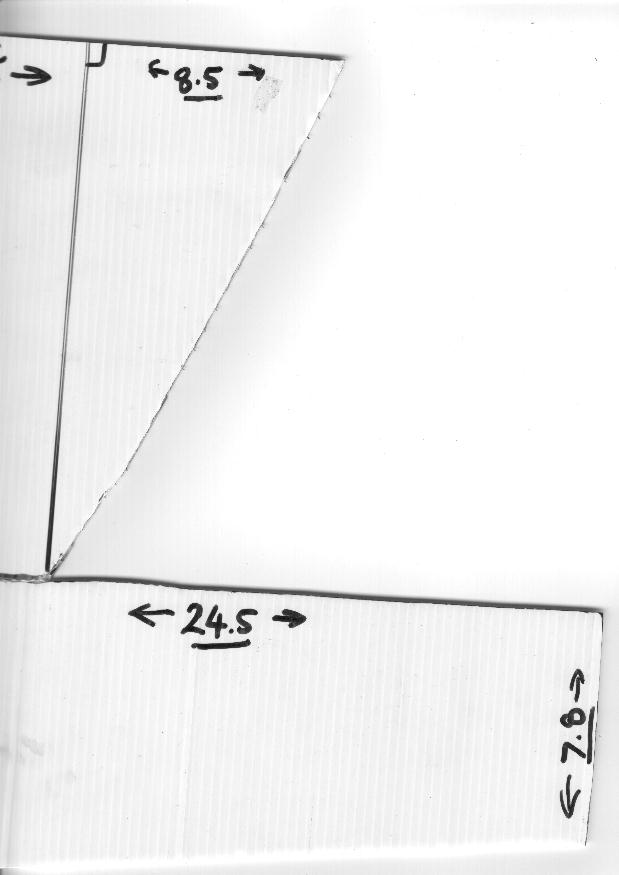
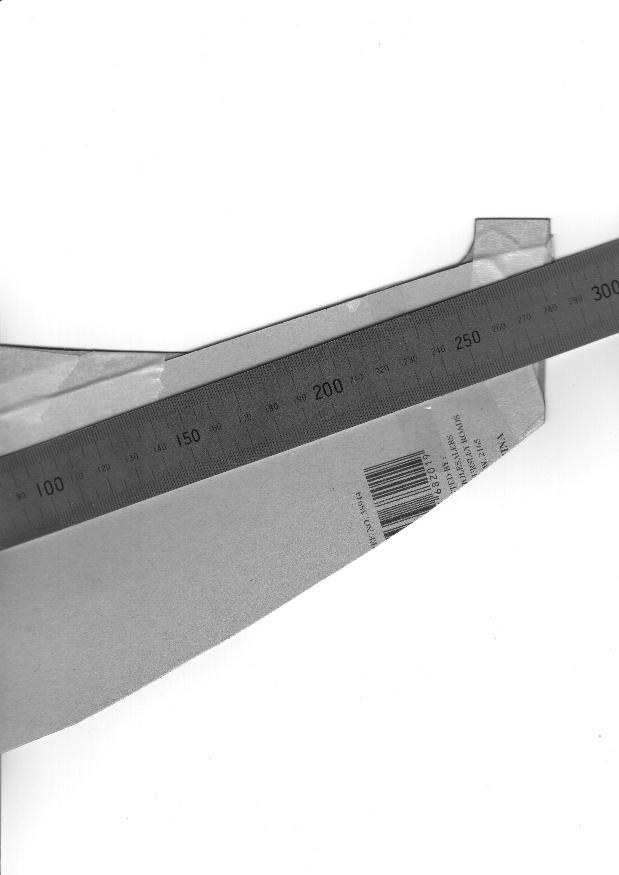
Here are three scans of the BFI headlight template. I have included dimensions in cm (1cm = 0.3937008 inches). They all overlap to give you one template. If you print them out they won't be to scale. Maybe they will help you make your own - maybe they will just add to the confusion!
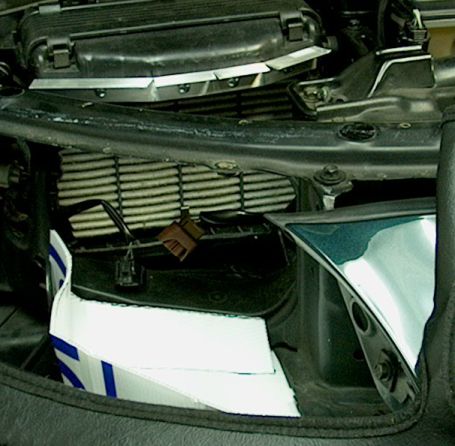
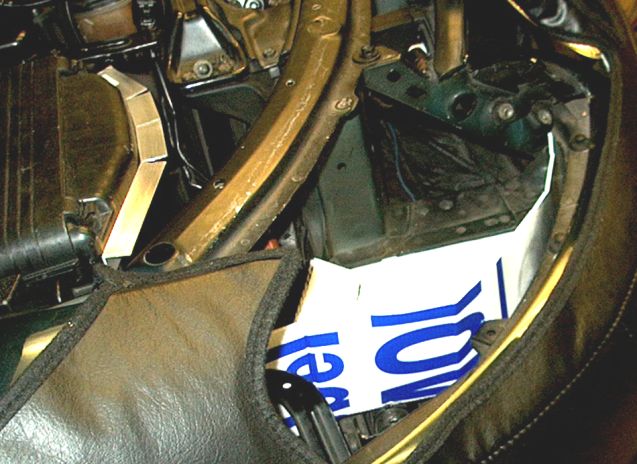
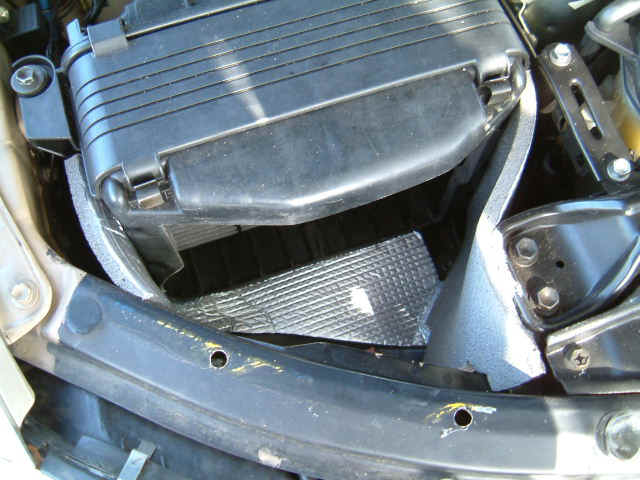
The BFI headlight chamber template is sitting in its spot here - the edge is a bit bent here where the square bottom of the headlight squashes and seals it
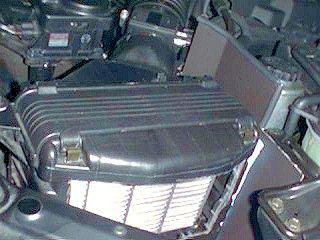
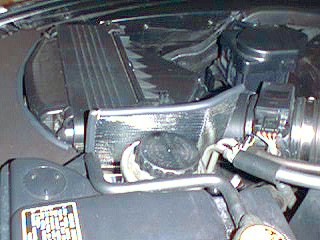
3. The BFI Airbox - standard requirement on every Soarer - maximum filtration and air flow.
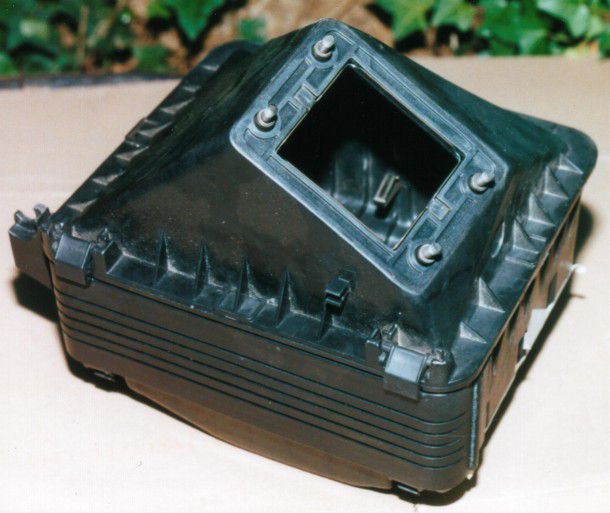
The back of the V8 airbox is hard to beat - seals perfectly, fits perfectly - top stuff
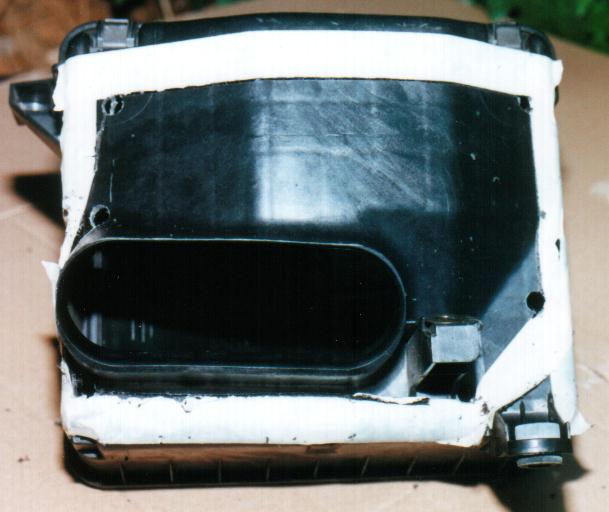
Important to leave about 13mm gap up the top to screw angle aluminium later. I masked the outline I wanted to cut out. Then drilled 6 pilot holes in the corners to get the jigsaw in and out
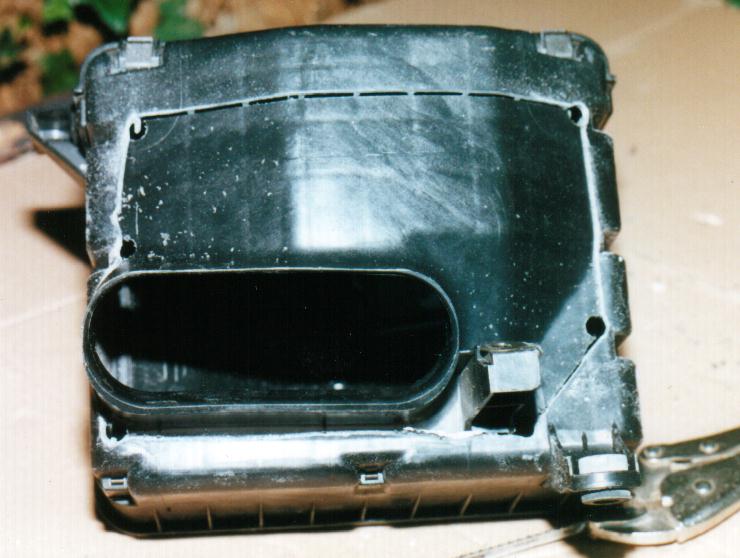
The jigsaw will cut out most of it - but not all - you can't quite reach the difficult bits. When I had done what I could with the power tool, I popped out the blade and grabbed it in some vice grips and finished it off by hand - it was easier than I thought - you could do the whole thing like this. The front bit then comes off complete.
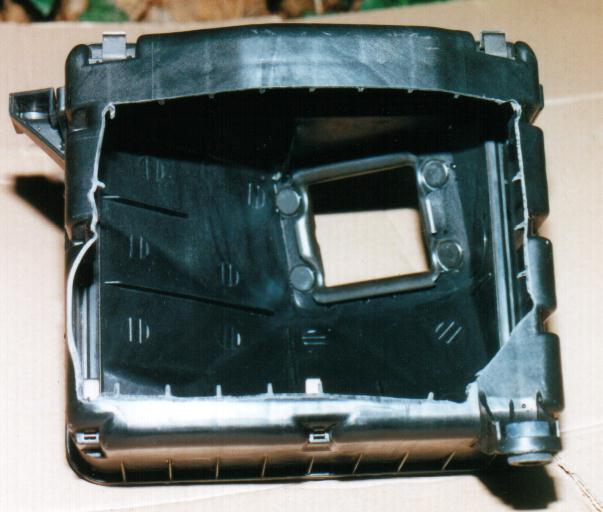
The inside of the airbox is great. Check out the bellmouth around the square opening to increase flow. The airbox is large, the flow is direct, you can change the filter real quick. It is the perfect adapter to the Air Flow Meter. Nothing will outflow the back of the airbox - buying an aftermarket adaptor can only make the flow worse.
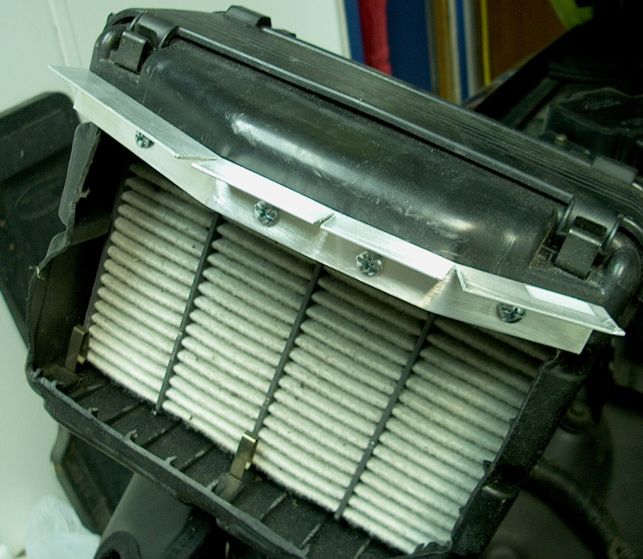
I screwed on some 20mm square aluminium angle to support the BFI top cover. I wanted a cover thin enough so the bonnet would close and seal ok, so it really needed support at the airbox too, the aluminium aids sealing too. Using 20mm angle leaves enough room to use scrivets along here too.

The template for the top cover.

Scan 1 of the top template
Scan 2 of the top template
BFI's from around the World
The Hawaii BFI. This is just a BFI air box with no under headlight chamber. This car is a latter model (note the hot wire Mass Air Flow rather than the earlier model Karman Vortex Air Flow Meter) with the slot already formed in the nose cone.
A different top cover style
Extending the side cover along the back to reduce heatsoak
England BFI . This is a pic of different style BFI under construction with a full width under headlight plate. Here's what Iain had to say about the BFI "....difference is alarming, the car is a quantum leap forward in throttle response and acceleration is markedly quicker and she is smoother, worth all �5 that it cost a hudred times over,.... My 'mods' to the original is ABS plastic piece 'moulded' to shape and revised lower lip for scooping the air up into the intake, it really is the best power-mod to do to your Soarer"
The Melbourne BFI. Barry : "..the whole thing works a treat. The economy is sparkling 440kms for 40 litres (31.5 mpg in the old language on a recent "run") and the mid range grunt is enormous on the V8.Best bang for your $ ever"
by ALSC
1. The BFI Intake Chamber - a large pressurised chamber of swirling fresh air - most debri is removed in this chamber. Car cooling is not affected. This is a straight forward procedure to make. Take the bottom engine try off so you can see the old plastic screws you have to remove. I reccommend this intake point for every Soarer, even the regular V8's.
The bolts that hold the intake flap firmly in place. I used 8mm bolts, 50 mm long with large washers to clamp onto the plastic intake edge. Notice the bolts are threaded full length - these were hard to get like this - I had to go to Universal Fastners to get them - couldn't get them that long at the hardware store - or couldn't get them threaded full length. 8mm metric refers to the tread size - this will screw right in to the hole in the bumper left by the plastic scrivet that used to secure the plastic flap to the bumper. This will hold the flap securely up to 178 km/hr - there is considerable force pushing the flap down when you are moving.
These are scrivets - they hold the plastic flap to the bumper - you can buy them for $2 a pack from auto parts stores - so don't worry about saving the old ones or damaging them - just get 'em out! I used new ones to hold my BFI top cover down for that original factory look - you can also get x-tree clips - they will all be on a stand together - check it out - heaps of handy bits and pieces there. I got mine at Andrew's MotorMate (08)8357 4211
So here are the two bolts that hold the intake flap firmly in place. The bolt on the intake side is adjusted to hold the flap level with the opening in the bumper. The second bolt is adjusted to close off the flap - I have tried opening it up further but there doesn't seem be any performance improvement by opening up the intake any further - might as well let the air through to the radiator. The temperature gauge has never budged even on the hottest days - so the air we are taking from here and diverting to the intake still leaves enough for the cooling system.
Close up of the first bolt holding the intake flap
The second bolt - you can adjust this bolt to let more air in or exclude air - You might as well close it up - no performance bonus from opening it up.
The intake must be sealed for maximum effect. This is the hole on the battery side of the car. This should be sealed. I have taken out the headlight to see it properly. We are talking about that triangular hole where the sight glass is for the air cond pokes through. In the middle of the hole in the background you can see the intake bolt shining. Worthwhile sealing. If you leave the headlight in place the best you can do is stuff an old T-shirt down there to seal it. Take the headlight out and you may be able to custom fit some plywood and rubber foam to seal it - use your imagination - you'll think of something!
This is where all the clean, cold, dry air comes out of the first chamber. The dirt, bugs and water get separated in the first chamber and drop out - it is self cleaning to a degree. All the air comes charging out of this triangular hole. No use putting any sort of pipe through here - it just reduces the area and reduces flow (I tried everything). You want to collect all this beautiful cold air and divert it into the intake. It can't go anywhere else. It won't go up the top because it is sealed against the bonnet - take a look - see the two rubber seals - one along the radiator support bar and the other along the nose - this area is already sealed up the top. It was just a big empty useless chamber just waiting to be BFI'ed. We are very fortunate that our car has such a chamber.
2. The BFI under headlight chamber - this bit seals off the intercooler (unless you have regular V8) and smoothly directs the air under the headlight into the airbox.
Check this out! An oragami Headlight BFI chamber! This is folded out of plastic corflute, light, strong and waterproof. We had an election here and all the politicians used this stuff to advertise themselves - we use it for BFI templates! I've had one in for about 3000 km so far and it is still going great. It just sits there with nothing else holding it in and works great.
See how deep it is? Full depth for maximum area and flow. Ramps up to headlight hole with a small edge that tucks down and holds itself in place. The front edge rests on the bumper support - it doesn't move once it is in.
Here are the templates laid side by side - the one on the left is for the airbox top
Here are three scans of the BFI headlight template. I have included dimensions in cm (1cm = 0.3937008 inches). They all overlap to give you one template. If you print them out they won't be to scale. Maybe they will help you make your own - maybe they will just add to the confusion!
The BFI headlight chamber template is sitting in its spot here - the edge is a bit bent here where the square bottom of the headlight squashes and seals it
3. The BFI Airbox - standard requirement on every Soarer - maximum filtration and air flow.
The back of the V8 airbox is hard to beat - seals perfectly, fits perfectly - top stuff
Important to leave about 13mm gap up the top to screw angle aluminium later. I masked the outline I wanted to cut out. Then drilled 6 pilot holes in the corners to get the jigsaw in and out
The jigsaw will cut out most of it - but not all - you can't quite reach the difficult bits. When I had done what I could with the power tool, I popped out the blade and grabbed it in some vice grips and finished it off by hand - it was easier than I thought - you could do the whole thing like this. The front bit then comes off complete.
The inside of the airbox is great. Check out the bellmouth around the square opening to increase flow. The airbox is large, the flow is direct, you can change the filter real quick. It is the perfect adapter to the Air Flow Meter. Nothing will outflow the back of the airbox - buying an aftermarket adaptor can only make the flow worse.
I screwed on some 20mm square aluminium angle to support the BFI top cover. I wanted a cover thin enough so the bonnet would close and seal ok, so it really needed support at the airbox too, the aluminium aids sealing too. Using 20mm angle leaves enough room to use scrivets along here too.
The template for the top cover.
Scan 1 of the top template
Scan 2 of the top template
BFI's from around the World
The Hawaii BFI. This is just a BFI air box with no under headlight chamber. This car is a latter model (note the hot wire Mass Air Flow rather than the earlier model Karman Vortex Air Flow Meter) with the slot already formed in the nose cone.
A different top cover style
Extending the side cover along the back to reduce heatsoak
England BFI . This is a pic of different style BFI under construction with a full width under headlight plate. Here's what Iain had to say about the BFI "....difference is alarming, the car is a quantum leap forward in throttle response and acceleration is markedly quicker and she is smoother, worth all �5 that it cost a hudred times over,.... My 'mods' to the original is ABS plastic piece 'moulded' to shape and revised lower lip for scooping the air up into the intake, it really is the best power-mod to do to your Soarer"
The Melbourne BFI. Barry : "..the whole thing works a treat. The economy is sparkling 440kms for 40 litres (31.5 mpg in the old language on a recent "run") and the mid range grunt is enormous on the V8.Best bang for your $ ever"
by ALSC